
As a chef, I’ve always believed that a fruit charcuterie board is the perfect blend of art and nutrition. This vibrant display not only pleases the eye but also tantalizes the taste buds. Whether you’re hosting a summer brunch, a family gathering, or simply want to enjoy a refreshing treat, a fruit charcuterie board is your go-to solution. In this detailed guide, I will walk you through the steps of creating a fruit charcuterie board that will leave your guests in awe. Let’s dive in!
Why a Fruit Charcuterie Board?
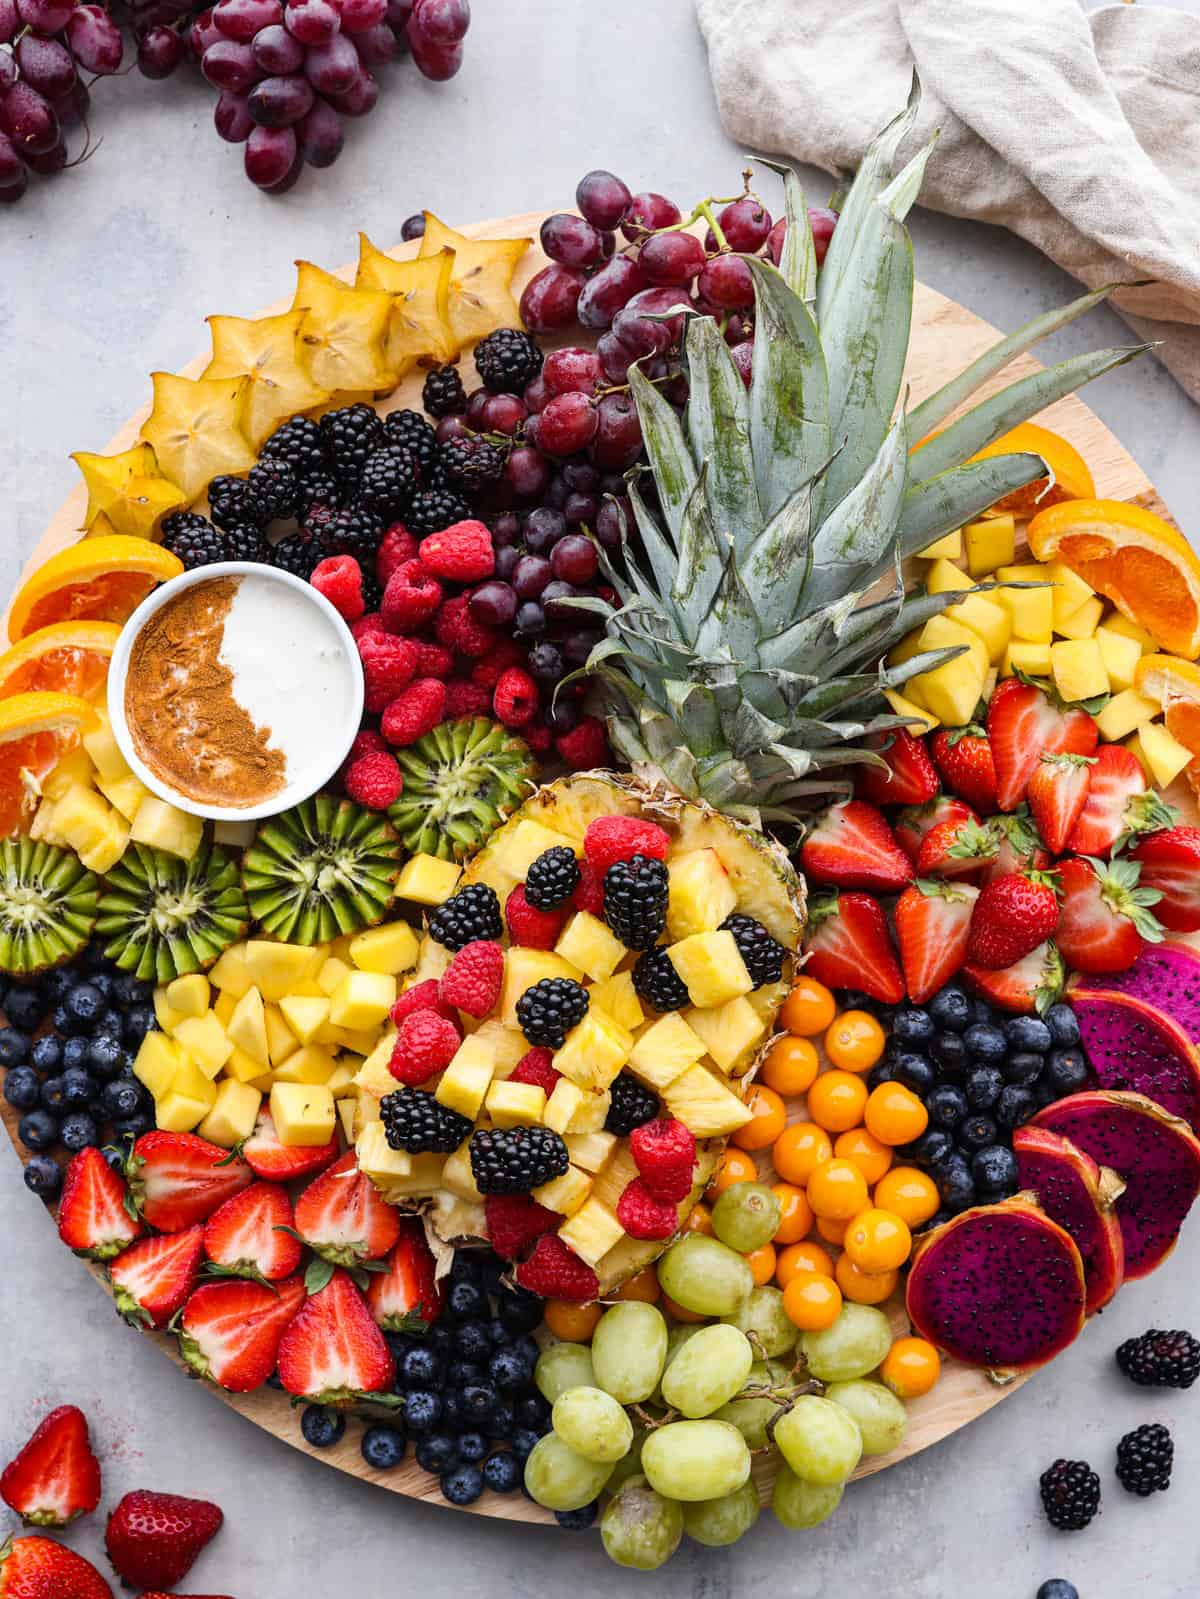
A Feast for the Eyes and the Palate
A fruit charcuterie board is not just about serving fruit; it’s about creating an experience. The colors, textures, and flavors combine to make every bite a delight. It’s a healthy option that can satisfy sweet cravings while offering essential vitamins and nutrients.
Versatile and Customizable
The beauty of a fruit charcuterie board lies in its versatility. You can tailor it to the season, the occasion, and personal preferences. It can be as simple or as elaborate as you like, making it suitable for any event.
Ingredients for a Fruit Charcuterie Board
Selecting the Best Fruits
For the perfect fruit charcuterie board, choose a variety of fruits that are in season, ensuring they are fresh and ripe. Here’s a list of fruits that work well:
- Berries: Strawberries, blueberries, raspberries, and blackberries
- Citrus: Oranges, grapefruits, and tangerines
- Tropical Fruits: Pineapple, mango, and kiwi
- Stone Fruits: Peaches, plums, and cherries
- Melons: Watermelon, cantaloupe, and honeydew
- Exotic Fruits: Dragon fruit, pomegranate, and starfruit
- Others: Apples, grapes, and bananas
Additional Components
To elevate your board, consider adding these extras:
- Cheese: Brie, goat cheese, or aged cheddar
- Nuts: Almonds, walnuts, or pistachios
- Dips: Yogurt, honey, or chocolate sauce
- Herbs: Mint or basil for a fresh touch
Step-by-Step Directions
Preparing the Fruits
- Wash and Dry: Thoroughly wash all fruits to remove any pesticides or dirt. Pat them dry with a paper towel.
- Slice and Dice: Cut the fruits into bite-sized pieces. Keep the shapes varied—some slices, some cubes—to add visual interest.
- Prevent Browning: Dip apple and pear slices in lemon water to prevent browning.
Arranging the Board
- Choose Your Board: Select a large, flat surface like a wooden cutting board or a marble slab.
- Place the Larger Items First: Start with larger items like bowls of dip or whole fruits. This helps anchor your design.
- Add Variety and Color: Arrange fruits in groups, balancing colors and textures across the board.
- Fill in the Gaps: Use smaller fruits like berries and grapes to fill in any gaps.
- Add Extras: Place cheese, nuts, and herbs around the board to create a cohesive look.
Final Touches
- Drizzle and Garnish: Drizzle honey over the fruits if desired and garnish with fresh herbs for a pop of color.
- Serve Immediately: A fruit charcuterie board is best enjoyed fresh, so serve it as soon as it’s prepared.
Tips for a Perfect Fruit Charcuterie Board
Seasonal Selection
Using seasonal fruits not only ensures the best taste but also keeps your board vibrant and cost-effective. In summer, go for berries and melons; in winter, opt for citrus and pomegranates.
Balancing Flavors
Balance sweet and tart flavors to keep the palate interested. Pair sweet strawberries with tart kiwi or tangy pineapple with creamy cheese.
Texture Matters
Incorporate different textures—crunchy nuts, creamy cheese, and juicy fruits—to create a more engaging eating experience.
Visual Appeal
Remember, we eat with our eyes first. Make your board visually appealing by playing with different colors and shapes. Use the rule of thirds to create a balanced look.
Serving Suggestions
Pairing with Beverages
Pair your fruit charcuterie board with light, refreshing beverages. Sparkling water, champagne, or a chilled white wine complement the freshness of the fruits beautifully.
Ideal Occasions
This board is perfect for brunches, picnics, baby showers, or any casual get-together. It’s also a great option for a light dessert after a heavy meal.
Health Benefits of a Fruit Charcuterie Board
Fruits are packed with essential vitamins, minerals, and antioxidants. They can boost your immune system, improve digestion, and provide a natural source of energy. By incorporating a variety of fruits, you ensure a wide range of nutrients in your diet.
Conclusion
Creating a fruit charcuterie board is an art that combines creativity with healthy eating. It’s a delightful way to present fruits in a manner that is both attractive and appetizing. With the tips and steps outlined in this guide, you’re well on your way to crafting a stunning fruit charcuterie board that will impress your guests and provide a nutritious treat. Enjoy the process, and most importantly, enjoy the delicious results!
Fruit Charcuterie Board
Create a vibrant and delicious fruit charcuterie board with a variety of fresh, seasonal fruits, cheeses, nuts, and dips. Perfect for any occasion, this healthy and visually appealing spread is sure to impress your guests.
Ingredients
Instructions
-
Wash and dry all fruits thoroughly.
-
Slice and dice the fruits into bite-sized pieces.
-
Prevent browning of apples and pears by dipping them in lemon water.
-
Choose a large, flat board for your display.
-
Place larger items like bowls of dip or whole fruits first.
-
Arrange fruits in groups, balancing colors and textures.
-
Fill in gaps with smaller fruits like berries and grapes.
-
Add cheese, nuts, and herbs around the board.
-
Drizzle honey over the fruits if desired and garnish with fresh herbs.
-
Serve immediately and enjoy!

Thanks for sharing.